|
|
||
|---|---|---|
| .. | ||
| images | ||
| install.sh | ||
| plane-app | ||
| README.md | ||
1-Click Self-Hosting
In this guide, we will walk you through the process of setting up a 1-click self-hosted environment. Self-hosting allows you to have full control over your applications and data. It's a great way to ensure privacy, control, and customization.
Let's get started!
Installing Plane
Installing Plane is a very easy and minimal step process.
Prerequisite
- Operating System (latest): Debian / Ubuntu / Centos
- Supported CPU Architechture: AMD64 / ARM64 / x86_64 / aarch64
Downloading Latest Stable Release
curl -fsSL https://raw.githubusercontent.com/makeplane/plane/master/deploy/1-click/install.sh | sh -
Downloading Preview Release
export BRANCH=preview

curl -fsSL https://raw.githubusercontent.com/makeplane/plane/preview/deploy/1-click/install.sh | sh -
NOTE: Preview builds do not support ARM64/AARCH64 CPU architecture
--
Expect this after a successful install
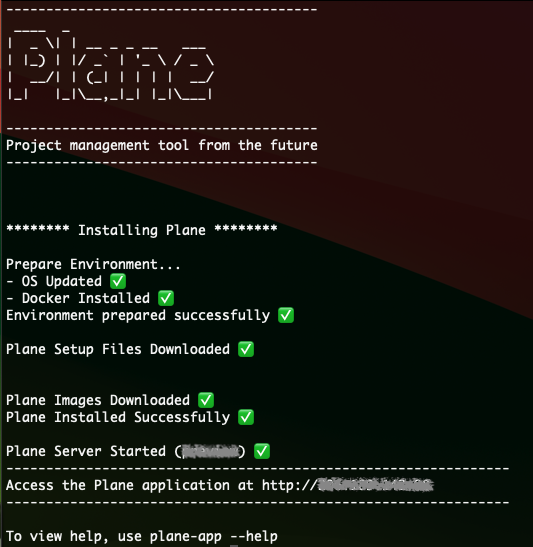
Access the application on a browser via http://server-ip-address
Get Control of your Plane Server Setup
Plane App is available via the command plane-app. Running the command plane-app --help helps you to manage Plane
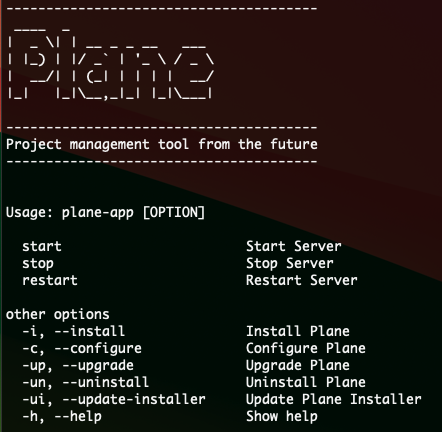
Basic Operations:
- Start Server using
plane-app start - Stop Server using
plane-app stop - Restart Server using
plane-app restart
Advanced Operations:
-
Configure Plane using
plane-app --configure. This will give you options to modify- NGINX Port (default 80)
- Domain Name (default is the local server public IP address)
- File Upload Size (default 5MB)
- External Postgres DB Url (optional - default empty)
- External Redis URL (optional - default empty)
- AWS S3 Bucket (optional - to be configured only in case the user wants to use an S3 Bucket)
-
Upgrade Plane using
plane-app --upgrade. This will get the latest stable version of Plane files (docker-compose.yaml, .env, and docker images) -
Updating Plane App installer using
plane-app --update-installerwill update theplane-apputility. -
Uninstall Plane using
plane-app --uninstall. This will uninstall the Plane application from the server and all docker containers but do not remove the data stored in Postgres, Redis, and Minio. -
Plane App can be reinstalled using
plane-app --install.
Application Data is stored in the mentioned folders:
- DB Data: /opt/plane/data/postgres
- Redis Data: /opt/plane/data/redis
- Minio Data: /opt/plane/data/minio